Copyright (c) 2005, The Jhai Foundation.
Permission is granted to copy, distribute and/or modify this document
under the terms of the GNU Free Documentation License, Version 1.2
or any later version published by the Free Software Foundation;
with no Invariant Sections, no Front-Cover Texts, and no Back-Cover
Texts.
GNU Free Documentation License
The Jhai PC System
Introduction
To use your Jhai PC, you should become familiar with a
few device names.
The device names in the "Orientation" section of this
guide will help you
to become familiar with your Jhai PC. You don't have
to memorize the
definitions, but you should know the basic concepts of
these devices.
Once you have finished reading the Orientation section, you
can go on to the
next section entitled "Using the Jhai PC." This part
of the guide
shows you how to turn on and use your Jhai PC.
After logging in to the computer, the screen will
become light blue. The
screen will then show the KDE desktop. The section
entitled "Using the
KDE Desktop" will illustrate some of basic
applications of the KDE desktop.
The section entitled "Viewing Web Pages" contains
information about how
to open the Web Browser Program, the Jhai Web Page,
and the Google Web
Page. The user should know these steps if he/she wants
to get familiar
with web pages.
The section entitled "Using Email," tells you
how to use a web browser to work with email. It also consists of
instructions on how
to open an e-mail account as well as sending and
receiving e-mail messages.
The "Using Open Office Programs" section introduces how to
write a document and use a spreadsheet. There are
step-by-step
instructions that show how to open the Openoffice.org
Writer
program and Spreadsheet program as well as the method for
saving files.
You can find information on how to make phone
calls using the Jhai PC telephone
in the section entitled "Using the Jhai PC
Telephone".
It explains how to dial a local phone call,
dial another Jhai PC telephone, dial a long distance phone call,
and receive a phone call.
The "Troubleshooting" section provides
information on how to
solve problems if your Jhai PC isn't functioning
properly. It has
helpful advice for problems such as no dial tone on
the Jhai PC
telephone, or if the network doesn't show up on the
Jhai PC.
Orientation
The Jhai PC consists of a Jhai PC CPU, a video, a
trackball, a keyboard,
a telephone set, and a printer. The following image shows
the components of the Jhai PC system.
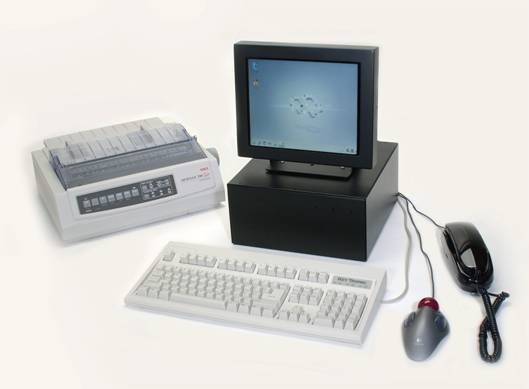
The Jhai PC system
Jhai PC CPU
CPU is short for "Central Processing Unit." The Jhai
PC CPU is the part
of a computer (a microprocessor chip) that does most
of the data
processing. It is in the same class as the Pentium II
processor.
Physically, the Jhai PC CPU is installed and protected
inside the black square case.
On the front of the Jhai PC is a toggle switch for
power and a
rotary switch that powers the display for up to thirty
minutes.
Jhai PC Video Display
Jhai PC video display on top of the Jhai PC presents
information
in visual form on a Liquid Crystal Display (LCD)
screen.
The LCD displays image resolution in 1024 X 768 pixel
format.
The Jhai PC video display connects to the Jhai PC with
two cables.
One cable is used to connect to video signals from the
CPU case, and
the other cable is used to connect to power from the
CPU case.
Trackball
A trackball is an electronic device that lets you
position a pointer
on the screen. It lets you choose and move images on a
computer screen.
The trackball consists of a rotating ball, left and
right buttons,
and a cable connecting the top of the trackball to the
Jhai PC.
The rotating ball controls the coordinates of a
pointer on a computer
screen. The pointer is a small, black arrow. After the
Jhai PC is powered up and running, try moving the ball
and see how the pointer on the screen responds.
Roll the ball forward to move the pointer up, backward to
move the pointer
down, to the right to move the pointer to the right,
and to the
left to move the pointer to the left.
Press the left button to select whatever image is under
the pointer.
If you press the left button twice, quickly (double-click),
the system will open a window for whatever image is beneath
the pointer. This is how you can open files and directories
(folders) .
Hold the left button down and roll the ball to select
many images or to select text.
Press the right button to see the properties of the
image under the pointer.
Keyboard
A keyboard is a hardware device on a computer terminal
that lets you type into the Jhai PC.
The keyboard consists of a number of mechanical
buttons (or keys),
which you press to input alphabetical and numeric
characters into the computer.
A cable connects the keyboard to the Jhai PC.
Telephone
A telephone is an electronic device that converts
sound into electrical
signals that can be transmitted over distances and
then converts
received signals back into sound. It consists of a
socket, a handset,
one spiral cable, and one phone connector cable.
The function of the socket is to hold the
handset.
The handset has a mouthpiece and earpiece mounted on
the either end.
Buttons for inputting numbers to dial are located on
the handset.
A cable connects the handset to the socket.
The phone connector cable connects the socket to the
phone outlet on the Jhai PC.
Printer
The printer is a machine that prints text and graphics
on
paper. A user's manual accompanies the printer.
The printer requires two cables, a black ink ribbon,
and paper.
One cable is used to connect the printer to power. The
other cable
connects the printer to the Jhai PC.
A black ink ribbon is required to print black text or
graphics.
Paper is needed for printer to print out text and
pictures.
Turn On the Jhai PC
- Raise the toggle switch on the front of the Jhai PC
to turn on power.
- Twist the rotary switch on the Jhai PC to turn on
the display.
Using the KDE Desktop
After you turn on the Jhai PC and display, you should
see the KDE desktop on the display.
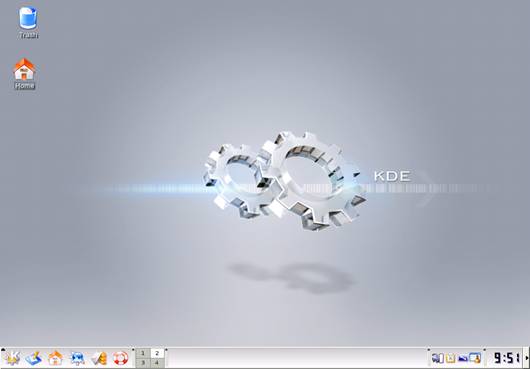
The KDE Desktop
Look at the bottom of the screen. You should see a set
of images. Each image is an icon (an icon is a small
image that represents something: a file or a folder
or a program).
- Move the pointer over the bottom left icon.
Within a second, "Click here to browse and start
applications"
descriptions appear. This icon is called "Start"
button.
- Move the pointer over to the third icon to the
right from the "Start" button.
Within a second, the description of that icon
appears as
"Personal Files." This icon is called "Home."
You can save all files in "Home".
- Move the pointer over to other icons to read their
descriptions to get familiar with the desktop.
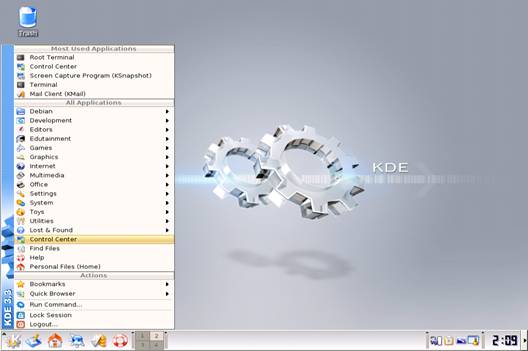
Use the Start Menu
- Move the pointer onto the "Start" button.
- Press the left button on the trackball.
The "Start" menu should now be displayed.
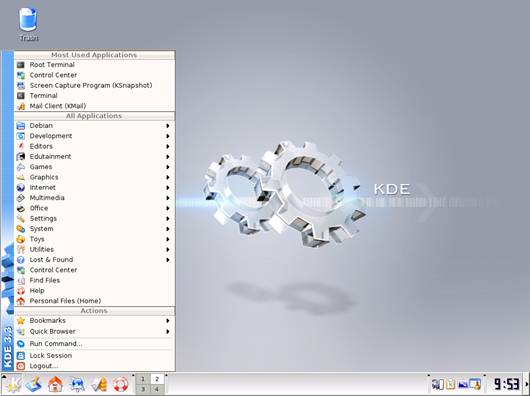
The KDE desktop with the opened "Start" menu
How To Get Help
- Move the pointer over to the "Start" button.
- Press the left button on the trackball to view the
"Start" menu.
- Move the pointer over the "Help" item.
- Press the left button to open the Help sub-menu
(a sub-menu is a menu that appears for one of the
items in a menu: the Start menu has a Help item, and
the Help item has its own sub-menu).

The KDE desktop with highlighted "Help" submenu
- Press the left button on the trackball to view the
"Start Page-KDE Help Center" window.
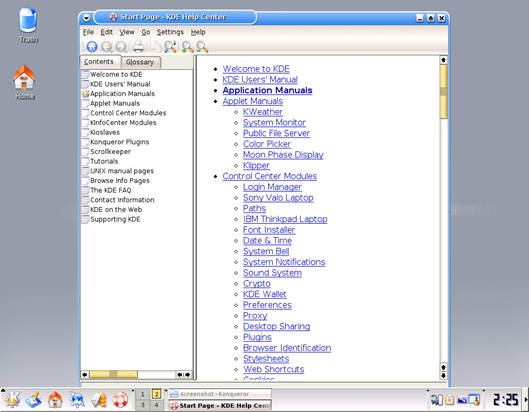
The window titled "Start Page KDE Help
Center"
- Move the pointer over to the tree listing of the
"Contents" or
"Glossary" tabs to find a name for which you want information.
- Move the pointer over the keyword to read its description,
shown in the right box of the window.
Change Mouse Response
- Move the pointer over to the "Start" button.
- Press the right trackball button to see the
"Start" menu.
- Move the pointer over to the "Control Center" submenu.
The KDE desktop with highlighted "Control Center" menu
- Press the "Control Center" submenu.
- Press "Index"tab in the " Control Center" window.

The window titled "Control Center"
- Move the pointer over the "Peripherals" tree.
- Press the "Peripherals" tree.
- Move the pointer over to the sub-tree entitled "Mouse."
- Press the "Mouse" sub-tree to open the "Mouse" box
shown on the right side of the "Control Center" window.
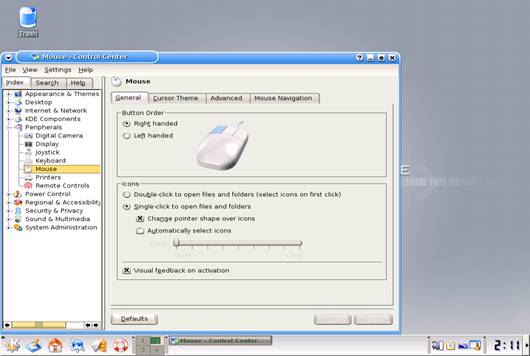
The window titled "Mouse-Control Center"
- Adjust the mouse response in the "Mouse" box:
General tab, Cursor Theme tab, Advanced tab, or Mouse
Navigation tab.
Viewing Web Pages
CHANGE
Open the Web Browser Program
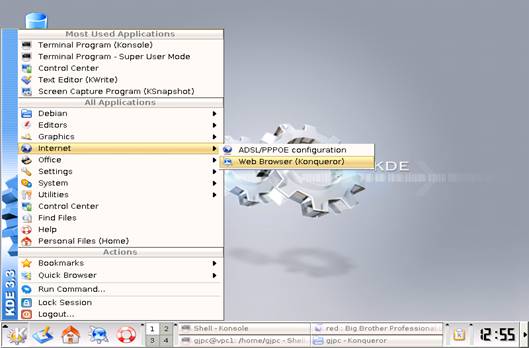
- Move the pointer over to the "Start" button.
- Press the left button of the trackball to view the
"Start" menu.
- Move the pointer over to the "Internet" submenu.
- Move the pointer to the "Web Browser (Konqueror)"
of the "Internet" submenu.

The KDE desktop with highlighted "Web Browser"
submenu
- Press the left button of the trackball on the "Web
Browser" submenu.
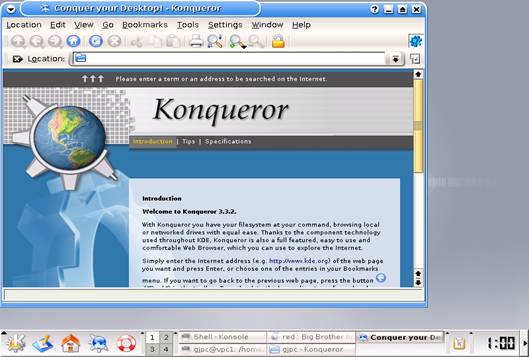
In a few seconds, the "Web Browser" window should
be displayed.
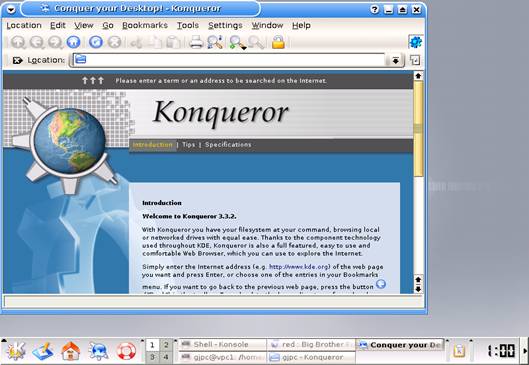
The window titled "Web Browser"
Open the Jhai Web Page
A Web Browser program is now open:
- Move the pointer onto the "Location" box
WHAT IS 'TEXT BOX'- Type Jhai's Internet address
"jhai.org" in the text box next to "Location" text.
In a few seconds, Jhai web page should be
displayed.

The Jhai Web Page
Open the Google Web Page
With A Web Browser program open:
- Move the pointer onto the "Location" box
- Enter Google's Internet address "google.com" in
the text box next to "Location" text.
In a few seconds, Google's home web page should be
displayed.
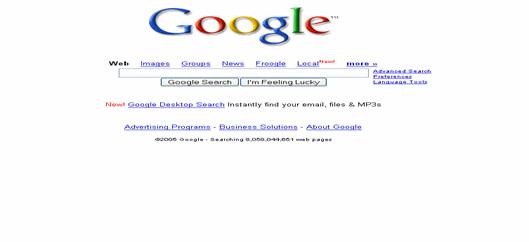
The Google Web Page
Using Email
You can use your web browser to access an email
service.
You can create your own, personal account with that
service.
After you have an account, you can send and receive
email.
Access an Email Service
First open the Web Browser.
- Move the pointer over to the "Start" button.
- Press the left trackball button to view the
"Start" menu.
- Move the pointer over to the "Internet"
submenu.
- Move the pointer over to the "Web Browser
(Konqueror)".
- Press the left trackball button on the "Web
Browser (Konqueror)".
The KDE desktop with highlighted "Web
Browser"submenu
- Type the Internet address of an email service in
the text box next to "Location" text.
Examples of Internet addresses are:
yahoomail.com, gmail.com, or hotmail.com.
For example, type in "mail.yahoo.com" in the text
box next to "Location" text.
The window titled "Web Browser"
- Press the "Enter" key on the keyboard.
In a few seconds, you should see the email
service main window.
Go to the next section, "Create Your Email
Account".
Create Your Email Account
Be sure your web browser shows an email service main
window.

The window titled "Web Browser"
Enter the Internet address for an email service, for
example yahoomail.com.
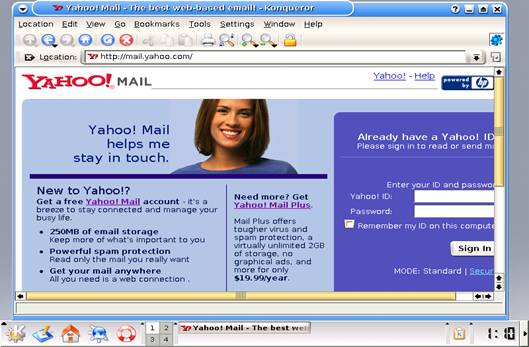
The window titled "Yahoo Mail"
- Move the pointer over to the "Free Yahoo mail Sign
Up Now" button.
- Press the "Sign Up Now" button.
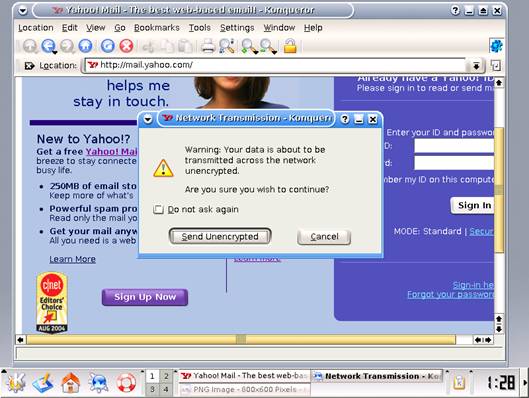
The panel titled "Network
Transmission-Konquer"
- Move the pointer over to the "Send Unencrypted"
button.
- Press the "Send Unencrypted" button.
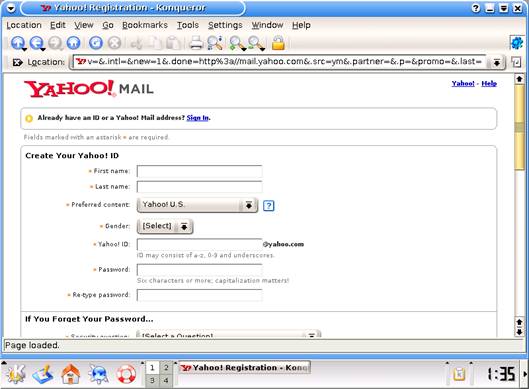
The web page titled "Yahoo! Registration"
- Move the pointer over to the left-most button
"Sign Up For".
- Press "Sign up for Yahoo! Mail."
- Fill in your information in the Yahoo mail sign up
form.
- Remember your login in name and password.
- Press the "I Agree" button after filling in your
information.
If every required space is filled, a
"Submit This Form Security" window should appear.
- Press the "Submit This Form Security" button on
the bottom of the page.
- Press the "Continue to Yahoo Mail" button in the
next panel that appears.
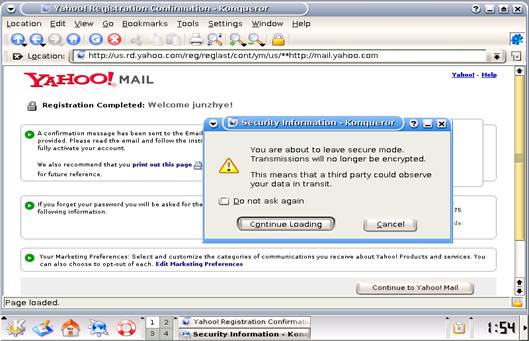
A panel titled "Security Information"
- Press the "Continue Loading" button in the next
panel that appears.
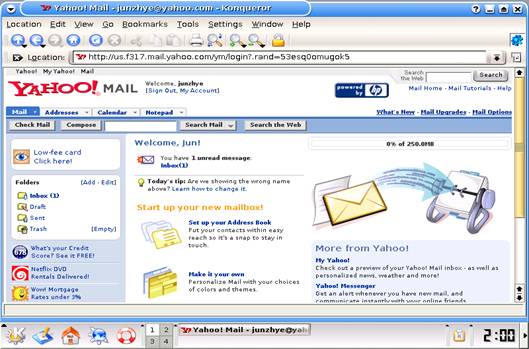
The web page titled "Yahoo Mail Login Home"
Send an Email Message
The email program window is now open and you should be
logged in to your email account. Your login name is your
email account address that others must use to send you
email. To send email to someone else, you must know
their email address. This takes the form of
person@service.com
- Move the pointer over the "Compose" button.
- Press the "Compose" button to bring up the "Send
email" page.
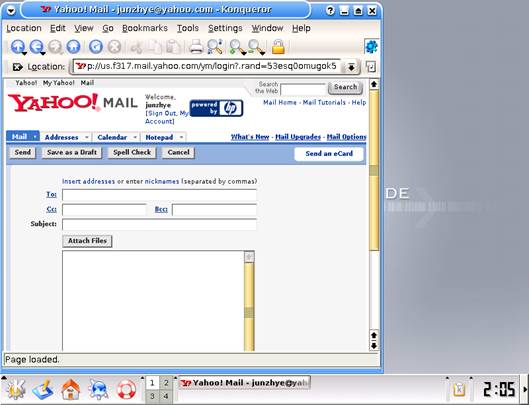
The web page "Send Email Page"
- Put the recipient's email address in the "To" box.
Use commas to separate each recipient's email
address if there is more than one recipient.
- Type a subject line in the "Subject" box if you
have one.
- Type the message in the text box below the
"Subject" box.
- Press the "Send" button after you have finished
typing your message.
Receive Email Messages
The email main window is open and you are logged in to
your email account.
- Move the pointer over to the "Inbox" folder.
- Press the "Inbox" folder to open the folder
- Press an uread meassage to bring up the message
page.
- Press the "Back to Messages" link above the
message box to see the "Inbox" folder again.
Using the Open Office Programs
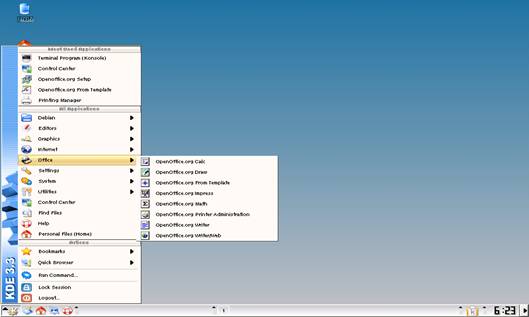
The KDE desktop with highlighted the "Office"
submenu
- Move the pointer over to the "Start" button.
- Press the left button on the trackball to view the
"Start" menu.
- Move the pointer over to the "Office"
submenu.
- Press a program to open.
Write a Document
- Move the pointer over to the "Start" button.
- Press the left button on the trackball button to
view the "Start" menu.
- Move the pointer over to the "Office"
submenu.
- Move the pointer over to the "OpenOffice.org
Writer"submenu.
In a few seconds, the "OpenOffice.org Writer"
program should be displayed.

The "OpenOffice.org Writer" program
- Move the pointer over to a white section of the page.
- Press the left button once. The pointer should appear to
change its appearance to an I shape. If you move the trackball,
you'll see the pointer move, leaving the I shape in the white
area of the page. This I shape is called a cursor. The cursor
shows the position at which the next character typed will appear.
- Type a word in the page.
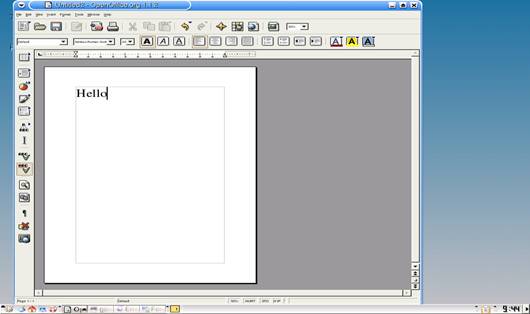
The OpenOffice.org Writer Program with the word
"Hello"
- Press "Enter" on the keyboard to start a new line.
- Move the pointer over to the "Help" menu for help.
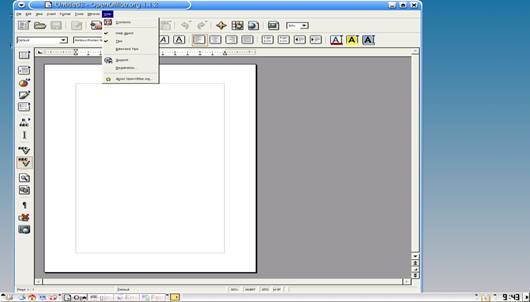
The "OpenOffice.org Writer" program with the
"Help" sub-menu
- Move the pointer over to the "File"menu.
- Press the left button on the trackball to pull
down (show) the "File" sub-menu.
- Move the pointer over to the "Save As"
sub-menu.
- Press the "Save As" submenu. In a few seconds, the
"Save As" panel should be displayed.
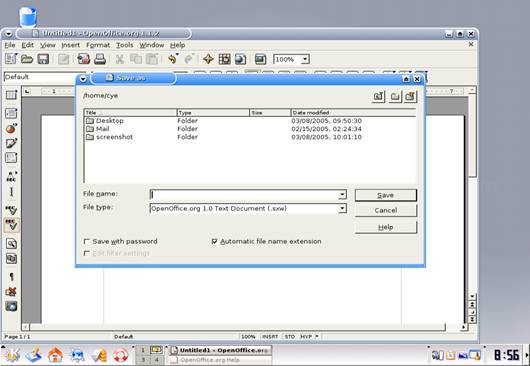
The "OpenOffice.org Writer" program and the
panel titled "Save As"
- Type a file name in the text box next to "File"
name.
- Press the "Save" button.
In a few seconds, the file name should be
displayed on the top left of the file.
Use a Spreadsheet
The following steps introduce the process of opening
a spreadsheet, entering a single number, then saving
your entry as a file. See the Help menu to learn how
to work with spreadsheets.
- Move the pointer over to the "Start" button.
- Press the left trackball button to view the
"Start" menu.
- Move the pointer over to the "Office"
submenu.
- Move the pointer over to the "Spreadsheet"
- Press the left trackball button on the
"Spreadsheet (Numeric Spreadsheet)".
In a few seconds, the "Spreadsheet" program should
be displayed.
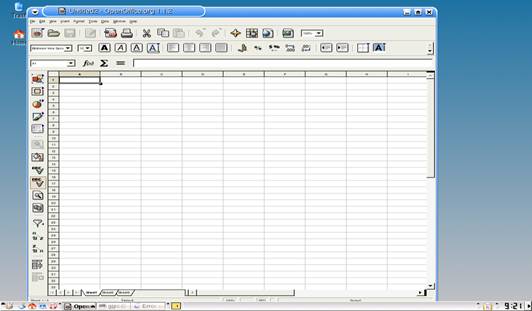
The "Spreadsheet" program
- Type a number in the first rectangle cell in the
first column of the page.
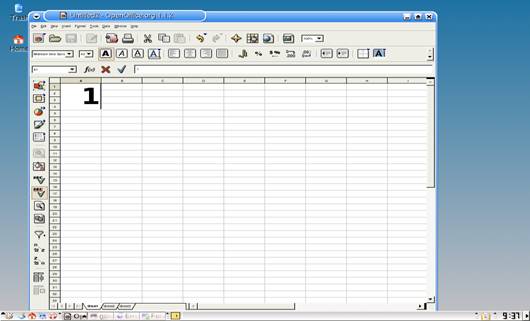
The "Spreadsheet" program with the number "1"
- Use the left, right, up and down arrow keys on the
keyboard to move.
- Move the pointer over to the "Help" menu for
help.
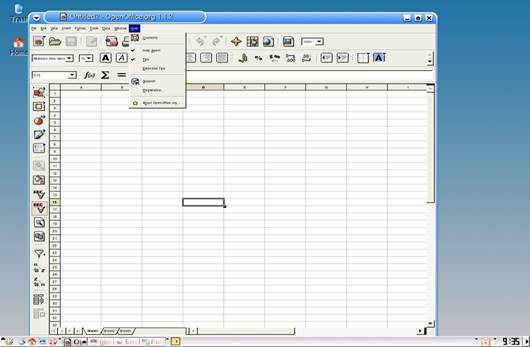
The "Spreadsheet" program with the pulled down
"Help" menu
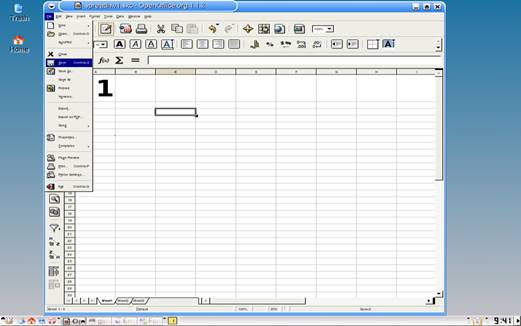
- Move the pointer over to the "File" menu.
- Press the left trackball button to pull down the
"File" menu.
- Move the pointer over to the "Save As"
submenu.
- Press the "Save As" submenu.
In a few seconds, the "Save As" panel should be
displayed.
The "Spreadsheet" program and the panel titled
"Save As"
- Change the suggested default file name in the text
box next to the "Name" text if you want.
- Change the suggested default save folder next to
"Save in Folder" to some other name that you want.
- Change the suggest default file type next to
"File Type" if you want.
- Move the pointer over to the "Save" button.
- Press the left trackball button on the "Save"
button.
BR>In a few seconds, the file name should be
displayed on the top left of the file.
Use Graphics
- Move the pointer on the "Start" button
- Press the left button on the trackball to view the "Start Menu"
- Move the pointer over the "Office" submenu
- Move the pointer over the "OpenOffice.org Draw" submenu
In a few seconds the "OpenOffice.org Draw" program should be displayed
The "OpenOffice.org Draw" Program
- Move the pointer over a to insert on the menu bar, single click and scroll down to graphics. Double click on graphics.
An insert graphic window will open in which you can search your computer for a variaty of formats of graphic files.
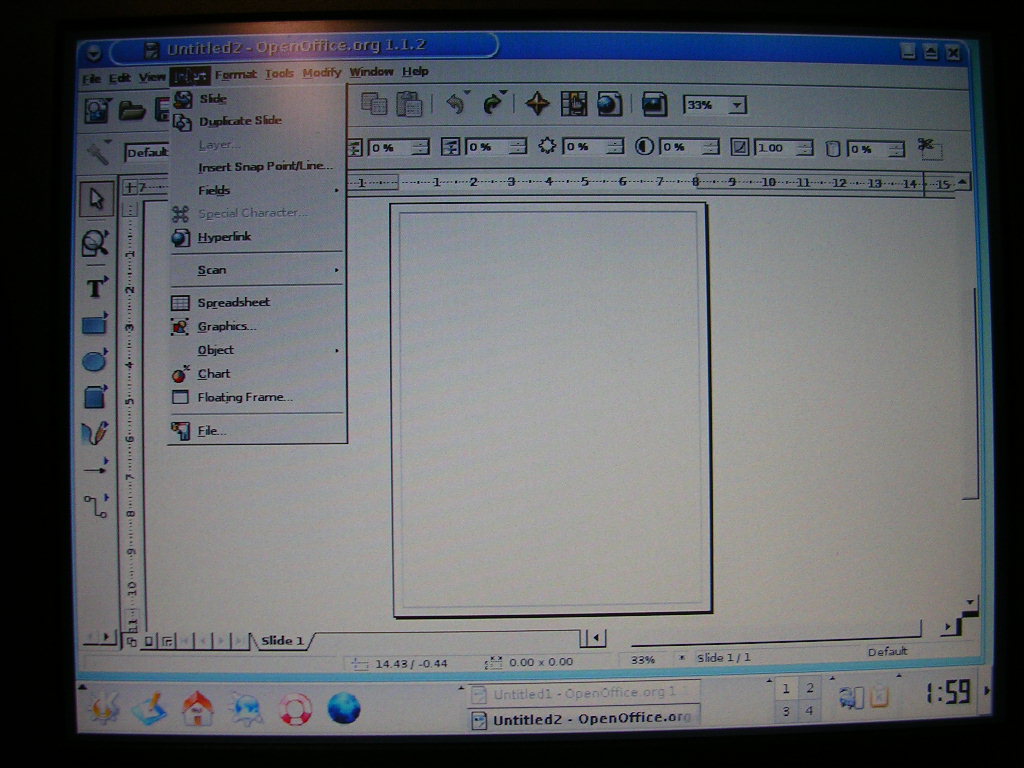
Insert graphics window
- Scroll down the and select the graphic Image gif as shown with the blue doughnut

Selecting an Image from the list
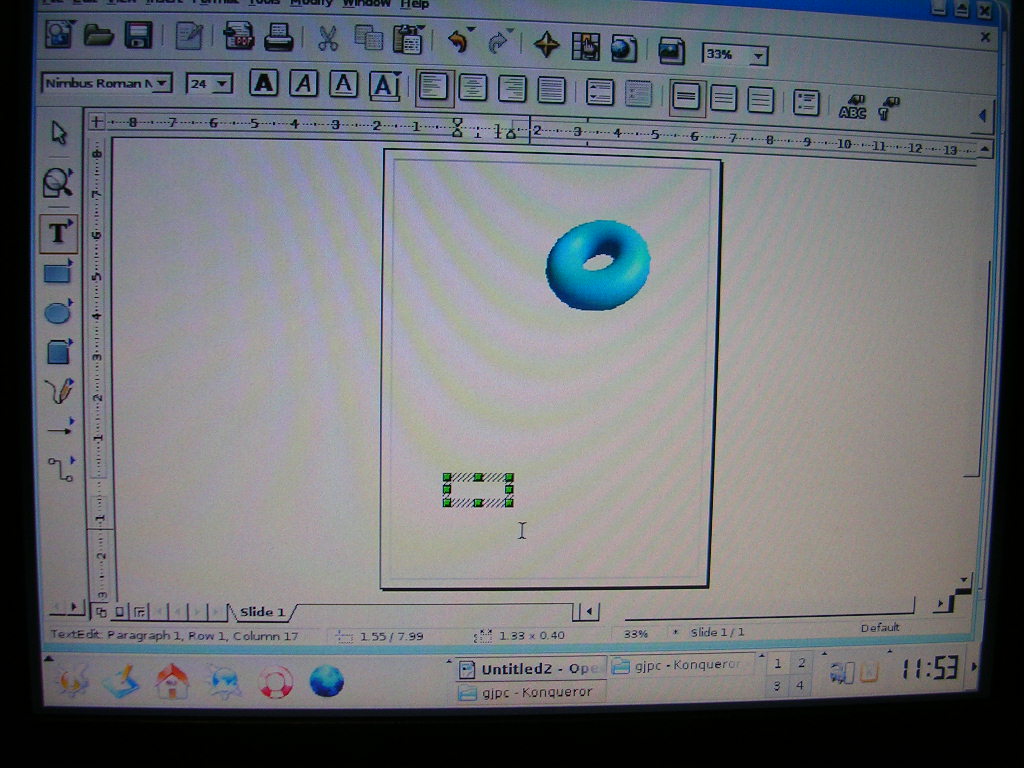
- Every graphic inserted into Open Office Draw appears with 8 grid dots around it which define the limits of the field.
You can right click on the Graphic to drag it around or to change the size.
- Now right click on the Graphic "a.gif" and drag it to the upper right hand of the field broader.
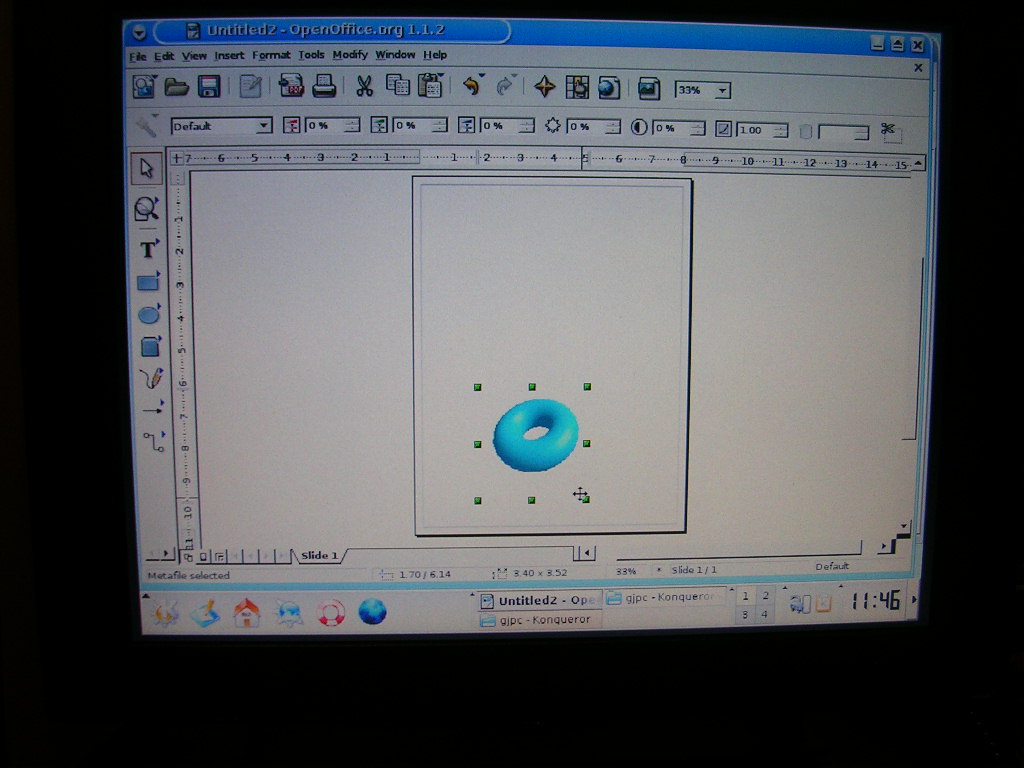
The Image appears in the field surrounded by 8 grid dots
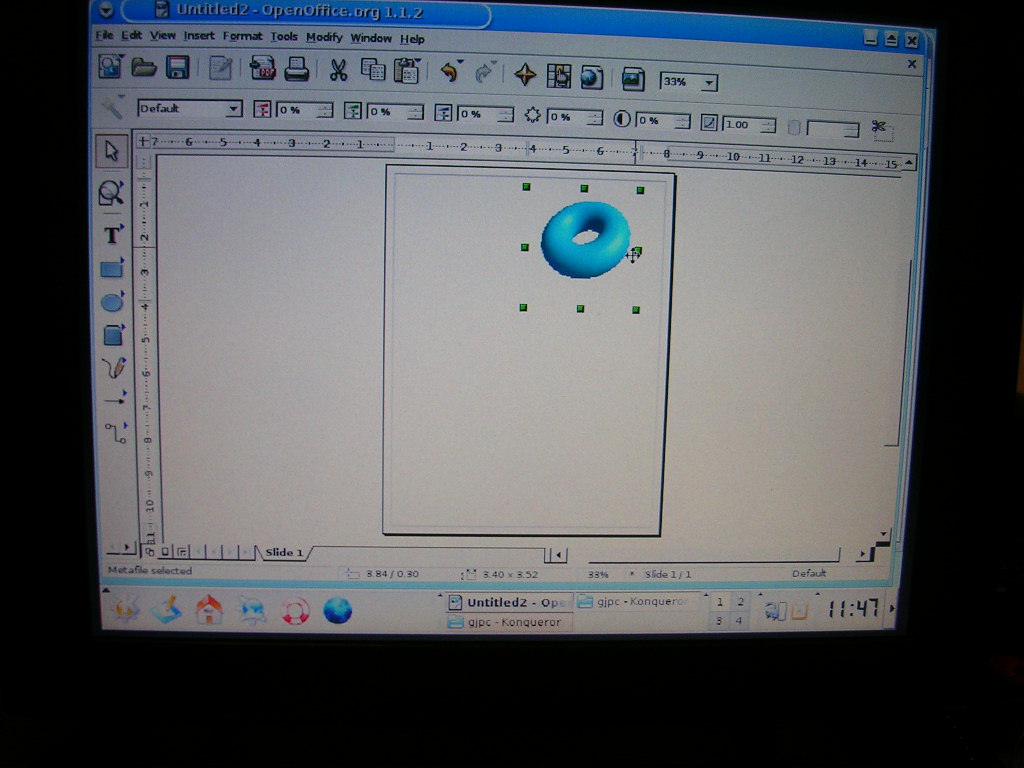
The Image in the upper right hand corner
- You can add text, figures, or color to your graphic by using options on the left hand tool bar.Now select the T for text Icon on the Left hand tool bar. Notice that it is now shaded grey which means you can click anywhere on the field to add text. Right click in the lower corner of your screen and you'll see the 8 gird dots appear around a nex text field.
The new text field in the lower left of the screen
- Now type Hello. You should now see the Text "Hello on the lower left of the screen.
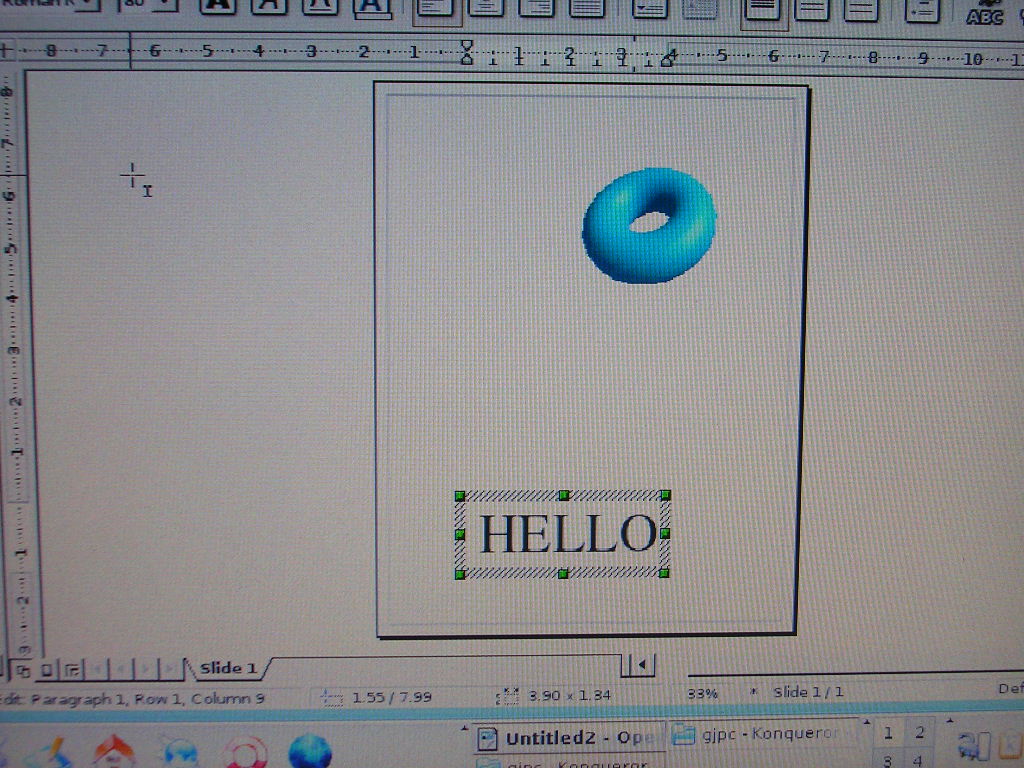
The word HELLO
- You can also change the size, color and font of the text using the Text toolbar which appears when selecting insert text.
The text toolbar
- Now select the the furthest A icon in the text toolbar above the Drawing Field and choose to change the text color to RED. Notice the text is Now red instead of Black.
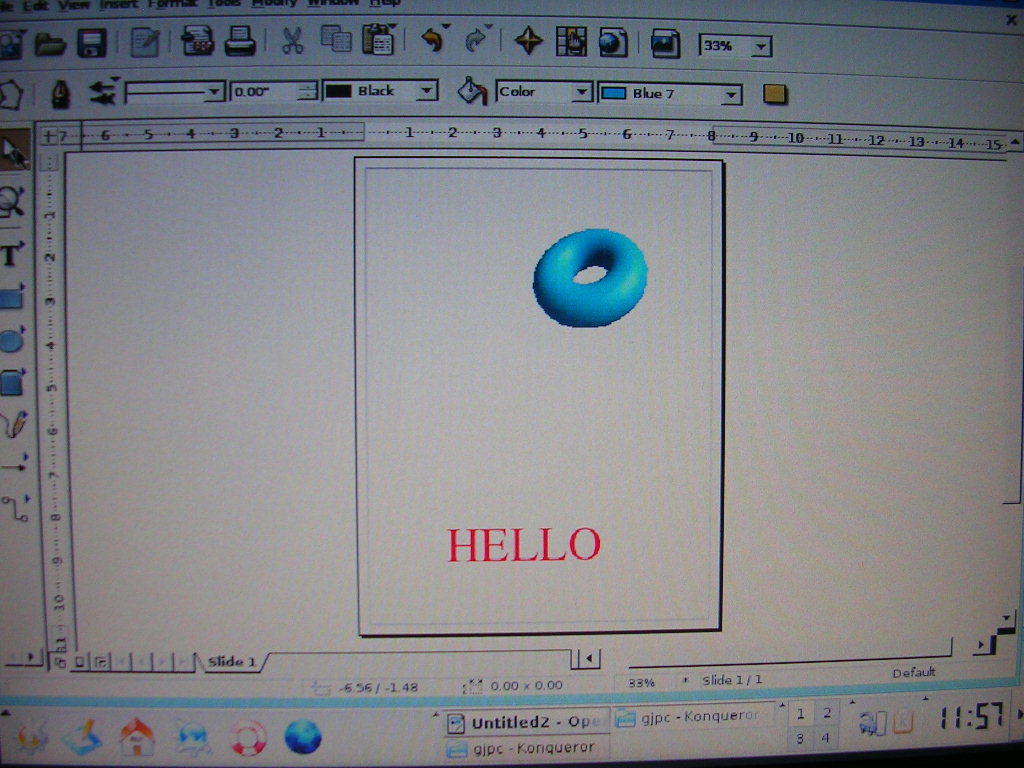
The A change font color Icon being selected
NOTE: For the rest of the tools just repeat the same steps used to insert text from the tool bar.
Storing your files on the internet
The Jhai PC does not have much storage space, so it would be a good pratice to store your files online.
There are a number of free web storage sites on the internet like;
WWW.RIPWAY.COM which allows you to store up to 30MB of files for free
WWW.PHOTOBUCKET.COM is a great site for storing and sharing images on the web.
If these two free web storage spaces are not available you can always do a google search for "free web storgae".
Using the Jhai PC Telephone
CHANGE
The Jhai PC telephone handset should be connected to
the Jhai PC. Your telephone number should be on a label
on the back of the Jhai PC.
Note: For incoming local calls, your phone
number has a 800 prefix.
Make a Local Call
To make a phone call, pick up the handset. Listen for
the dial tone and dial the number you wish to call.
Make a Long Distance Call
You need a phone card to make long distance phone calls.
Purchase any phone card and follow its instructions.
Receive a Call
When the telephone rings, pick up the handset and
speak with whomever is calling.
Note: remember to give your neighbors your
800 prefix and Jhai PC telephone number.
Note: the telephone does not work if your
Jhai PC is turned off.
Troubleshooting
Making Sure of Cable Connections
- Is the Jhai PC power cable attached to power?
- Is the display power cable attached to the
back of the display?
- Is the display signal cable attached to the
back of the display and to the back of the Jhai PC?